The material you choose for your roof should mesh well with the aesthetic of your home’s exterior. For instance, a stucco home has an enticing texture that would complement a slate tile or wood shakes roof.
Whenever possible, it is recommended to replace your roof before painting the house. This way, there is less risk of damage to the newly painted surface. Click https://bluespruceexteriors.com/ to know more.

As the visible component of your roof, shingles add both protection and aesthetic appeal. They come in a variety of color blends to coordinate with the color of your brick, siding, trim and entry doors. The granules (small particles that make up the surface) also help to reduce UV damage and deterioration to your roofing materials.
A common sign that your shingles are in need of repair is the presence of bald spots on your roof. Oftentimes, these bald spots are caused by the loss of granules. When granules are lost from your shingles, your asphalt composition roofing material becomes exposed and may be subject to further deterioration. You can help prevent this by repairing any bald spots as soon as you notice them.
Other signs of shingle deterioration include curling, cupping and clawing. These shingle distortions are indicative of weakened roofing materials and should be repaired as soon as they appear. The weakened shingles can also allow moisture into the home, leading to rot and mold growth.
The strength of your shingles is also affected by wind-related damage. A shingle can unbond from its substrate if it experiences creases and folds, a condition known as crinkling. Moreover, the presence of moss or algae on your shingles is another indicator that they are retaining moisture and deteriorating rapidly.
Impact-resistant shingles are designed to provide better resistance to hail and other debris, as well as high winds. Their ability to withstand such forces is measured using the UL 2218 standard set by Underwriters Laboratories. Shingles that can withstand the impact of a 1.25-inch steel ball are classified as Class 1; those that can withstand the impact of a 1.5-inch steel ball are classified as Class 2; and those that can withstand the impact of 1.875-inch steel balls are classified as Class 4.
Investing in a roof with impact resistant shingles can save homeowners time and money in the long run. They are also a great choice for areas that experience frequent severe weather events like hurricanes and tornadoes. In addition, many insurance companies offer discounts on homeowners’ premiums for homes with impact resistant shingles.
Underlayment
Underlayment is an important part of your roof that prevents water from seeping through the shingles and into the home. This waterproofing material is installed between the decking and the shingles, above the ice and water shield protection, to ensure that moisture can’t seep through to cause leaks or mold. It also protects your home’s structure, helping to prevent wood rot and prolonging the lifespan of your roofing materials.
There are several types of underlayment available, based on your roof’s needs and your budget. Asphalt-saturated felt is one of the most traditional underlayment options, and was the go-to choice until about 15 years ago when synthetic products began to gain popularity. It’s made from a flexible base layer drenched in asphalt, and it can be fastened to the roof using plastic caps or hammer staples. It’s water-resistant but not waterproof, and it’s best for sloped roofs where water can drain.
Synthetic underlayment is a more durable option that is less likely to rip than felt underlayment. It’s also resistant to heat and moisture, so it can withstand the elements more than felt underlayment and doesn’t crack or deteriorate in harsh weather conditions. It’s typically a bit more expensive than felt underlayment, but it’s worth the investment for the added durability.
Self-adhering underlayment is another option that saves time and money during installation. It’s made of a rubber-like material that has adhesive applied to it, and it’s easy to roll out onto the roof before placing your shingles. This type of underlayment is also breathable, which helps to avoid any excessive heat build-up under your shingles.
In addition to protecting your roof during the installation process, underlayment protects your home from severe weather events like rain, snow, sleet, hail, and wind. It creates a barrier between your shingles and the roof, which stops the loud sounds of storms from deafening your home. It’s also a sound barrier that makes it difficult for storms to penetrate your roof and damage the interior. It’s also a good idea to use underlayment at the valleys, eaves, and other protrusions of your roof to keep moisture away from these areas.
Ice and Water Shield
Roofing professionals use an additional layer of protection under the shingles, which is called an ice and water shield. It is tough, resilient and self-adhesive. It is also a waterproof barrier that seals around nail and staple holes to keep water out of the sheathing. It is a crucial part of any roof, especially those in cold climates that see snow and ice accumulation.
An ice and water shield is a thick sheet of a composite material with an adhesive on the underside that adheres to the sheathing. The type of ice and water shield your roofer uses depends on the situation. There are 3 main types: granular or sand surface, smooth and high heat. Most of the time, a granular or sand surface ice and water shield is used in a roof valley. It’s thicker than a smooth version, which makes it better at resisting thaw-refreeze cycles.
A smooth surface ice and water shield is designed for low-slope roofs that tend to leak. It’s not as thick as the granular or sand-surface variety, but it’s still a good choice. It can also be applied over the sheathing if the roof is leaking in areas that don’t have any valleys.
Your roofer will install ice and water shield along eaves, rake edges and other overhangs that are vulnerable to ice damming. It is a common building code requirement in cold climates. It is also recommended around skylights, dormers and vent pipes or chimneys.
The best ice and water shields have a rubberized asphalt adhesive that holds up against varying temperatures. The higher quality versions like CertainTeed’s WinterGuard or IKO’s ArmourGard have more of this adhesive than the cheaper options, which may not stick as well to the sheathing.
The ice and water shield should extend up to the gutters, or at least 2 feet past where it meets the exterior wall. It’s important to note that your roofer should not put ice and water shield over the entire roof because it can prevent it from breathing properly. This can lead to condensation that leads to mold and mildew growth.
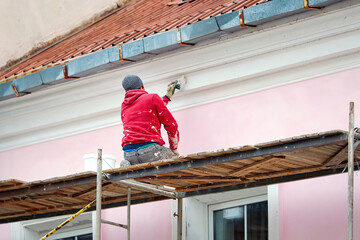
Stucco
A mix of Portland cement, sand, lime and water, stucco is an incredibly durable material. It can be molded into many different textures and hues to create a unique and beautiful exterior for your home.
Stucco is a great choice for homeowners who are looking for an alternative to wood siding or want a more natural look to their exterior. It is also extremely versatile and can be paired with either shingle or tile roofing materials. In addition to being a visually appealing option, stucco can also provide significant energy savings and insulation benefits.
However, just like other types of siding, stucco can be subject to damage from weather and other factors. Keeping up with regular maintenance can help prevent moisture penetration and the breakdown of this beautiful material.
Ignoring small cracks and damage can lead to more costly repairs down the road. If moisture can get in behind your stucco, it can cause mold growth and structural damage to your home. It can also damage the roofing system and cause leaks.
To prevent this, you should make sure that your stucco contractor has properly installed flashing where your roof meets the walls of your house. In addition, you should check for proper drainage areas to keep the moisture away from your stucco.
Additionally, you should regularly clean your stucco to remove dirt, stains and biological growths from the surface. This can be done with a hose or pressure washer on a low setting. You should also make sure that your stucco is well caulked and sealed around windows, doors and vents. Additionally, you should have your stucco inspected for signs of water damage or other problems at least twice per year. By taking care of these issues, you can protect your investment in a stunning stucco exterior for years to come.