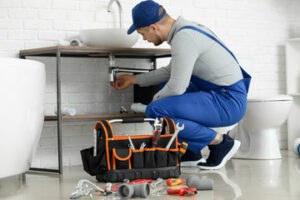
Scranton Plumbers specialize in the installation, repair, and maintenance of plumbing systems. They ensure that pipes, fixtures, and appliances function optimally, allowing for clean water supply and efficient drainage.
Plumbers typically undergo an apprenticeship program and become licensed after accumulating experience. They also have to meet local plumbing codes and standards.
A faucet acts like a mini dam, holding back a pressurized stream of water until you lift or twist the handle. Over time, though, the spigot or handles may begin to leak. Even a single drop of water can add up to serious problems, such as mold growth. The good news is that most bathroom and kitchen faucets can be repaired rather than replaced. If you’re handy, you can do it yourself and save the cost of a plumber’s fee.
Start by turning off the water supply. The shut-off valve is usually mounted underneath the sink, and it’s important to turn it off completely before attempting any repairs. Once the water is off, plug the drain with a stopper or rag to prevent small parts from falling down the sink drain.
Next, remove the faucet handle and spout. It’s often necessary to remove the spout aerator, so you can clean the aerator and the spout. This is an important step because aerators can become clogged with sediment or lime, which can lead to the leaking faucet.
Once the faucet is disassembled, you can replace any worn or damaged components. Most of the components are readily available at your local hardware store, and most manufacturers make their own faucet repair kits that contain all the necessary parts for your specific model. Before you purchase a kit, however, examine your faucet to determine the type. Most faucets have a label on the body or a screw that identifies the type. If you’re not sure which type you have, visit a plumbing or home improvement store that carries several brands of faucets and ask a knowledgeable salesperson for assistance.
When you’re ready to start working, it’s a good idea to take your time and work carefully. If you rush through the project, you might damage or miss something important and create a more difficult repair job in the future. If you’re not confident in your ability to fix the problem yourself, consider calling a plumber for help. While the plumber’s fees will be more expensive than a DIY project, the cost of a new faucet is likely to be much higher.
How to Fix a Dripping Faucet
If you have a cartridge or ceramic-disk faucet that’s leaking, the problem can often be resolved by replacing rubber or neoprene seals. You can buy these replacement parts at a hardware store or find premade kits that are specifically for your type of faucet. Before reassembling, it’s important to clean all the components and remove any mineral deposits or rust. Using vinegar or another mild cleaner can help you avoid the need for harsher cleaning solutions that could damage your faucet’s finish. Once you’ve cleaned the parts, rinse them thoroughly and dry them with a cloth. Apply a light coat of lubricant to the O-rings and other moving parts to ensure that they’ll seal properly when you reassemble the faucet.
The first step to fix a dripping faucet is to shut off the water supply valves under your sink. Once you’ve done this, turn on the faucet and check to see where the water is dripping from. This will help you determine which parts to replace.
Once you’ve figured out which parts need to be replaced, shut off the water and shut off the drain valve. Next, remove the faucet handle. If the faucet handle has a decorative cap that covers the screw, pry it off with a utility knife or a flathead screwdriver to expose the screw underneath. If the screw is seized, use penetrating oil to loosen it. Then, using a hex-head wrench or adjustable wrench, unscrew the handle and set it aside.
Now you can remove the valve stem assembly. It may have a cover that you can remove with pliers or an Allen wrench. Once you’ve removed the cover, unscrew the stem assembly’s packing nut with large slip-joint pliers or an adjustable wrench, being careful not to strip the threads. Once the nut is removed, you can remove the stem and inspect it for damage. If the stem is cracked or broken, it will need to be replaced.
Now you can reassemble the faucet. Make sure you’re following the instructions for your specific type of faucet and that all the parts are compatible. Once you’re finished putting it back together, make sure to tighten any screws that were removed and to apply a light coat of lubricant on the O-rings and washers to prevent them from sticking. Finally, reassemble the faucet handle and test it for leaks.
How to Fix a Faucet With a Cartridge
A dripping faucet can be a nuisance. It wastes water and it can also damage the fixture or the countertop. In some cases, the culprit is a cartridge that needs to be replaced. Luckily, this type of repair is relatively easy and doesn’t require any plumbing expertise. Start by turning off the water supply. There are usually valves under the sink that you can turn clockwise to shut off the flow of water. You can then remove the handle to expose the cartridge inside.
Examine the cartridge for any signs of damage or wear. If you see any pitting or flaking, you should replace it. You can find kits containing replacement parts at most hardware stores and home centers for about $3. Before you install the new part, make sure to coat all the washers with plumber’s grease.
Next, use a screwdriver to remove the handle screw or Allen wrench (depending on your model) and then pull the handle off. Once you have access to the cartridge, locate the retaining nut or clip (again, depending on your model) and loosen it. You may need a plastic tool, adjustable pliers or water pump pliers to help you grab the top of the cartridge and lift it out. Some water will come out with the cartridge-that’s normal.
If your cartridge is still in good shape, you might be able to fix it by replacing the O-rings. You can find these rubber seals in most hardware stores. If they are worn or damaged, you can soak them in vinegar to clean them up and then replace them.
Before installing the new O-rings, you should apply a light coating of plumber’s grease to them. This will help ensure that they’ll seal tightly and prevent water leaks. Then, insert the cartridge into the faucet body, ensuring that it’s properly aligned with any notches. Finally, replace the retaining nut or clip and then screw the handle back on. Turn the water valves back on and test the faucet for any remaining leaks. If you’re happy with the results, you can replace the decorative covers and handle.
How to Fix a Faucet With a Ball
Ball faucets are a common sight in kitchens and bathrooms because of their durability and ease of maintenance. They have fewer parts than other types of faucets, and their design is simple and ingenious. But sometimes these sturdy faucets still develop leaks or drips. But a little bit of patience and a few basic tools can make repairing a leaking faucet easier than you might think.
Before you begin the repair process, shut off the water supply to the sink by twisting the shut-off valve that’s usually mounted underneath your sink. It’s also a good idea to plug the drain with a towel or rag to prevent any small pieces from falling down the drain when you’re working under the sink.
Once the water supply is off, turn your attention to the faucet handle and remove it by loosening the screw on the underside with a wrench or screwdriver. Now you can access the hex-head screw on the top of the faucet body that holds the handle in place. Remove this screw and lift off the handle.
Now you can remove the valve seat and springs. You’ll need a screwdriver to pry them out of the faucet body and replace them with new ones. Make sure you get replacements that match your faucet’s model. You’ll find these at most hardware and home improvement stores.
A leaking spout is often caused by a worn or damaged O-ring that seals the spout at the bottom. If you’re able to remove the spout, you can replace this O-ring with one from your spare parts or another store purchase. If not, a plumber’s grease can help it form a tight seal and prevent leaks.
The last part to replace on a cartridge-type faucet is the disc cartridge itself. This is typically a ceramic disk with holes that align with the hot and cold water inlets. A cracked disc can cause leaks, so replacing it with a new one is essential. Again, you’ll need a kit from your hardware or home improvement store that matches your faucet model.